- "Lorule was just like Hyrule. So very beautiful. So very...promising."
- — Princess Hilda
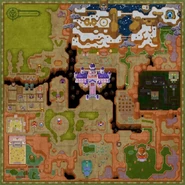
Lorule is a location from The Legend of Zelda: A Link Between Worlds. It is a dark parallel world to Hyrule, and shares the same basic geography. It is ruled by Princess Hilda. Lorule is accessed through cracks in surfaces that link Lorule and Hyrule together.
Background & History[]
Spoiler warning: Plot or ending details follow.
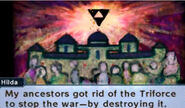
Prior to the events of A Link Between Worlds, Lorule was a stable world similar to Hyrule with even its own Sacred Realm and Triforce which was an upside down inversion of Hyrule's Triforce. However, Lorule suffered through its own civil war (similar to the Hyrulean Civil War) and/or other conflicts over it which caused the Royal Family of Lorule to take the desperate step of destroying their world's Triforce, believing it to be a means to end their strife. However, it instead caused their kingdom to crumble and fall apart even more, as presumably like Hyrule and its Triforce, Lorule's Triforce is connected to the land itself, thus its destruction caused Lorule fall in to ruin. This became so severe that the bottomless chasms divided Lorule into three major regions with no way to travel between them by land. The citizens themselves have become unruly and left to fend for themselves from monsters that have overrun the land while what remained of Lorule's castle guards defected to the Gemesaur King which resided in the Dark Palace, while others like the Lorulean Captain chose to simply abandon their post.
Princess Hilda, concerned with the future of Lorule, plotted with Yuga to abduct the Seven Sages as well as Princess Zelda and revive Ganon (then long deceased from his defeat in The Legend of Zelda: A Link to the Past) so they could gain Hyrule's Triforce, believing it to be key to saving the kingdom. Ravio, a long time servant of Princess Hilda's, refused to participate and fled as he was to much of a coward to confront either of them directly. Secretly, however, Yuga had no intention of saving Lorule, but rather use the Triforce to become a god and remake Lorule into his own image.
Yuga manages to abduct the Seven Sages as well as Princess Zelda and use the portraits they are trapped in to revive Ganon, despite Link's attempt to prevent it, though ultimately he fails and Yuga merges himself with the Ganon to obtain his Triforce of Power becoming Yuga Ganon. However Hilda intervenes by pretending to trap and seal Yuga Ganon before tasking the hero to rescue the Sages from the different regions of Lorule, so they can lead him to the Triforce of Courage. Hilda secretly keeps Princess Zelda's portrait hidden in her castle, which she speaks to justifying her questionable actions to both Zelda and herself.
After obtaining the Triforce of Courage, Link enters Lorule Castle and battles Yuga-Ganon once again, though not before Hilda reveals that she is in league with the sorcerer and is revealed to taken possession of Zelda's Triforce of Wisdom. After Yuga Ganon is defeated, Hilda orders him to hand over the Triforce of Power so she can wield it and the Triforce of Wisdom to defeat Link, but Yuga defies her revealing he was only using her to acquire the Triforce for himself which Hilda failed to realize while Ravio had known all along that Yuga could not be trusted. Yuga Ganon uses his power to turn Hilda into a painting which he swallows to absorb the Triforce of Wisdom, causing him to transform into an even more powerful form thanks to possessing two Triforce pieces. However despite this, he is no match for the power of the Master Sword and Bow of Light that Zelda gives to Link to aid him against the fiend.
Eventually Yuga Ganon is defeated freeing both Hilda and Zelda from their paintings is along with the Triforce pieces. Despite being weakened Hilda however refuses to give up and attempts to take the Triforce by force herself. However Ravio who had been helping Link who was actually Ravio's Hylian counterpart appears and manages to convince Hilda of the error of her ways by reminding her that her that stealing the Triforce for one's own benefit was one of the very reasons her ancestors had destroyed Lorule's Triforce. Remorseful for her actions, Hilda makes amends with Link and Zelda by taking them to Lorule's Sacred Realm and uses the last of the magic in Ravio's Bracelet to return Link and Zelda to Hyrule. Taking pity on Hilda for her desire to protect her people, the two who find themselves in Hyrule's Sacred Realm use Hyrule's Triforce to wish for the restoration of Lorule's Triforce, saving the dying kingdom and causing the black clouds covering the sky to part, causing a grateful Hilda to thank them from the bottom of her heart. Presumably, Hilda and Ravio used Lorule's Triforce to restore the Kingdom of Lorule to its former glory and likely sought to find another way to deal with the cycle of strife caused by its existence.
Spoiler warning: Spoilers end here.
Places of interest[]
Thieves' Town[]
The equivalent of Hyrule's Kakariko Village, the town is decaying and overrun with monsters. The townspeople are either wearing masks to avoid being killed by monsters or else hiding in the milk bar, much to the owner's dismay and irritation. The Thieves' Hideout is located here, run by Stalblind.
Misery Mire[]
The opposite of Hyrule's desert region, the mire is as the name suggests. There is a sizeable patch of desert that is walled off in the mire's north-west corner but the only way to access it is from the Desert Palace in Hyrule, which itself can only be accessed through Misery Mire.
Skull Woods[]
Lorule's equivalent to the Lost Woods and the Forest of Mystery. The portrait of Seres is hidden in the depths of the dungeon.
Death Mountain[]
Unlike the volcanic climate in Hyrule, Death Mountain in Lorule is the opposite, a cold snowy mountain with an inactive volcano. Two points of interest here are the Treacherous Tower (where Link battles enemies on a certain number of floors to win prizes) and the Ice Ruins, where the portrait of the Sage Rosso is held.
Dark Palace[]
The Dark Palace is the equivalent to the Eastern Palace of Hyrule. It is where the ferocious Gemesaur King resides and utilises puzzles involving light and dark. The grounds of the palace are patrolled by the Lorule Castle guards who defected from Princess Hilda and now worship the beast.
Lorule's Sacred Realm[]
Seen briefly during the game's ending, Princess Hilda and Ravio take Princess Zelda & Link to the place that was originally Lorule's Sacred Realm before Lorule's Triforce was destroyed. Princess Hilda explains that Yuga had discovered a large crack on the Sacred Realm's stone slab and was how Yuga & Hilda learned of the existence of Hyrule and its Triforce, causing Hilda to plot with Yuga to steal it to restore Lorule, unaware Yuga had no intentions of saving Lorule and instead wanted Hyrule's Triforce for himself.
In order to atone for her mistakes, Hilda uses the energy remaining in Ravio's Bracelet to send Princess Zelda, Link, and Hyrule's Triforce back to Hyrule's Sacred Realm. Shortly after transporting Zelda, Link, and the Triforce back to their proper realm, Hilda and Ravio witnessed the restoration of Lorule's Triforce by Zelda & Link's wish on Hyrule's Triforce, resulting in the Lorule's Sacred Realm and Lorule being restored along with its Triforce.
Like Hyrule's Sacred Realm its appearance presumably based on its Triforce's condition and/or reflects the heart of its wielder. As a result of the Lorulean Triforce's destruction, its Sacred Realm fell to ruins like much of Lorule did in the wake of its destruction.
Gallery[]
Etymology[]
The name "Lorule" is pronounced as low-rule, which would befit the counterpart of "Hyrule", pronounced as high-rule.
Other appearances[]
Subseries warning: This article or section contains information on a subseries within the Legend of Zelda series and should be considered part of its own separate canon.
Hyrule Warriors Legends[]
As part of the A Link Between Worlds DLC, Lorule appears on the eastern portion of the Lorule DLC Adventure Map.
Subseries warning: Subseries information ends here.


